 Orbit Helper
3DM Publisher is a software that enables users to access, update, and manage massive amounts of scanned data, imagery, 3D vectors, meshes, and 2D GIS/CAD data. Hardware-neutral, Orbit gives users the full 3D 360° view of the world by enabling real-time fusion of image data collection of any size from any system.
There are many ways to interact with Orbit 3DM to acquire needed information, a lot of them can be accessed from the sidebar on the left side of the screen.
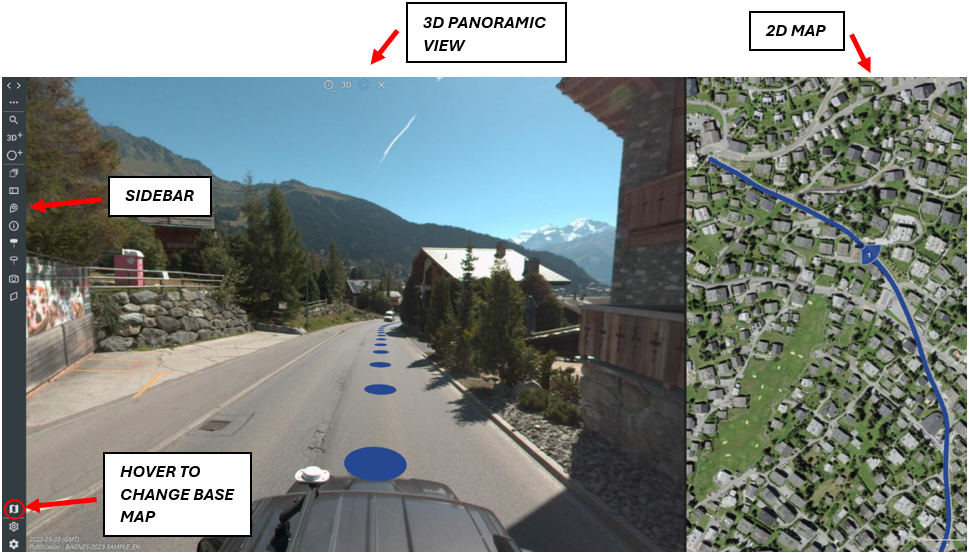
By default you can see two different views of the same area — 3D panoramic view on the left and 2D map from above on the right. These views are centered around camera positions (the blue dots) on the road, providing a user different kinds of GIS information. Both views can be zoomed in and navigated using mouse, just like Google Maps. Another view is free 3D point cloud that can be navigated freely. Additionally, you can change base map by hovering corresponding button on the sidebar.
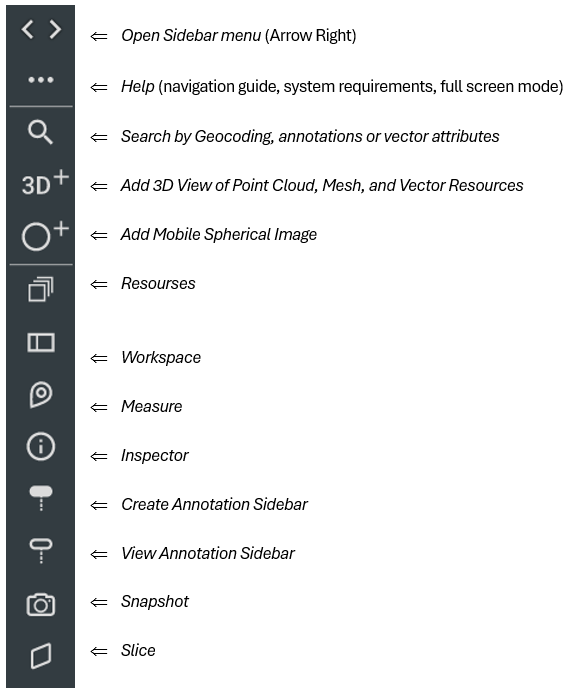
Here is an overview of the options available in the Sidebar menu (click the arrow right in the top left corner of your screen to access the menu):
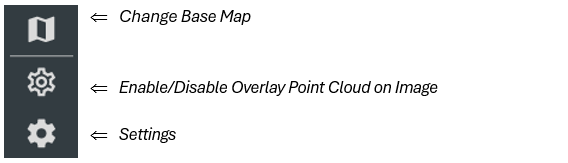
The Settings section gives you access to various tweaks and adjustments of the sowtware's appearance and functionality — general, resource, reference view, image views, navigation, measure, inspector.
More information on each option in the dedicated section.
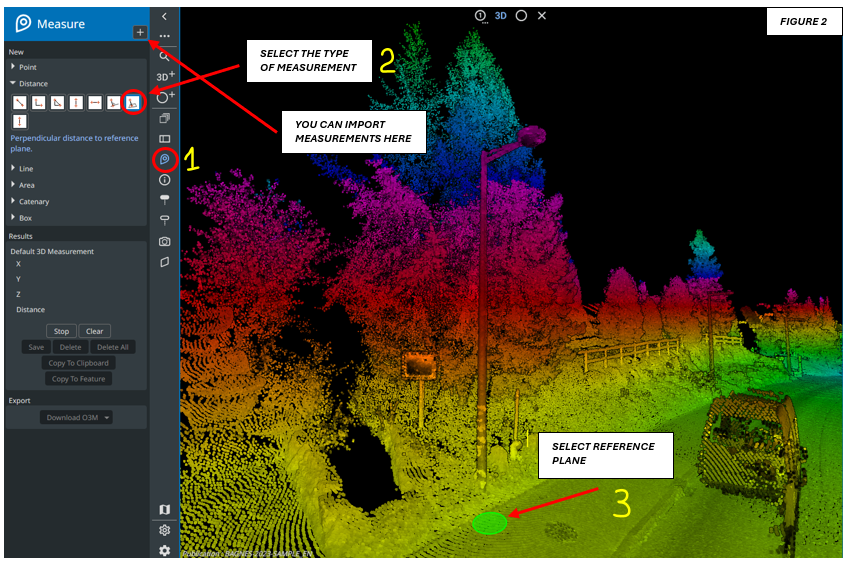
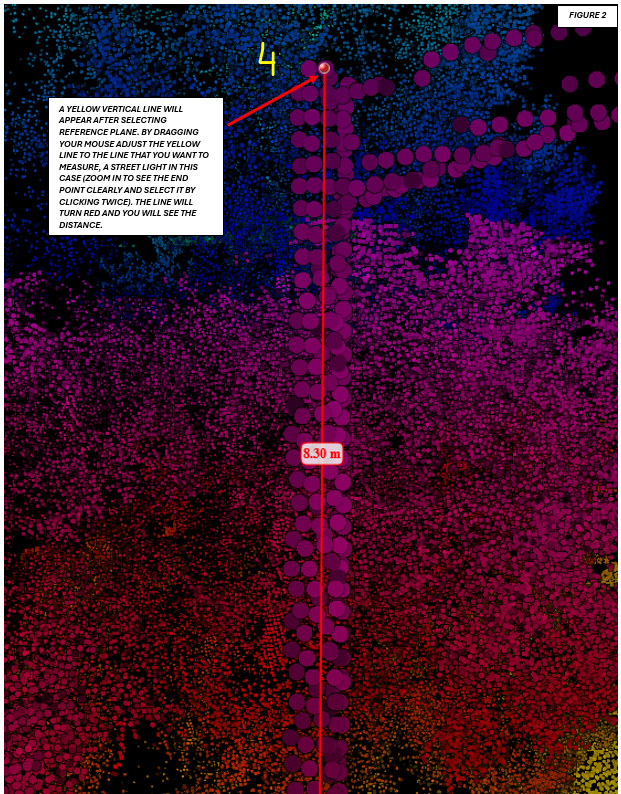
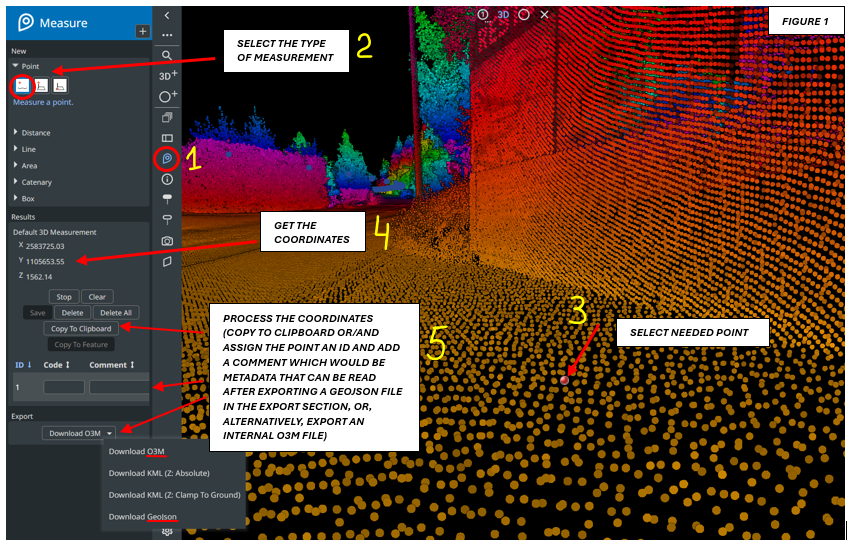
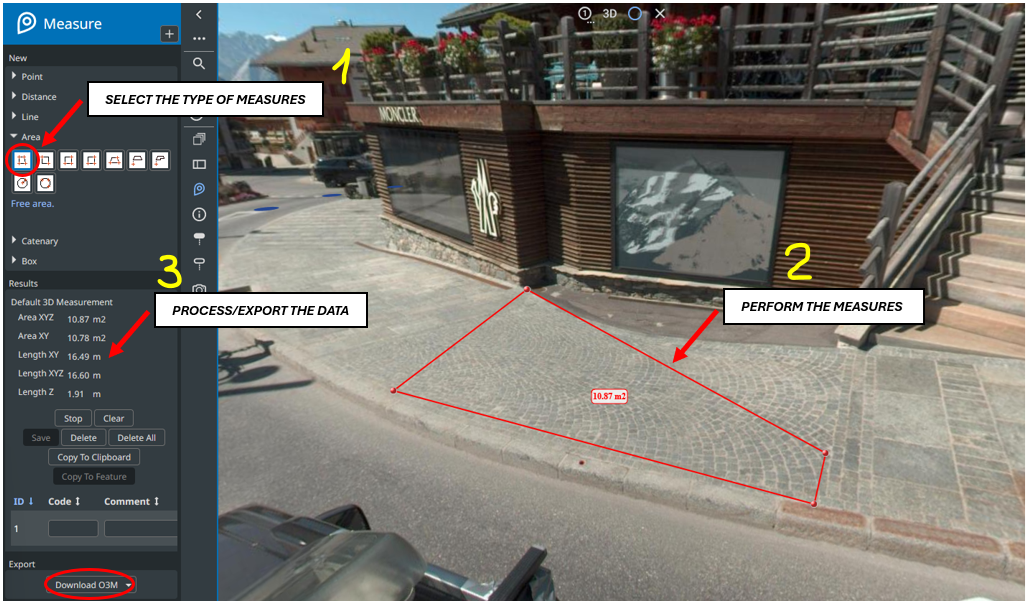
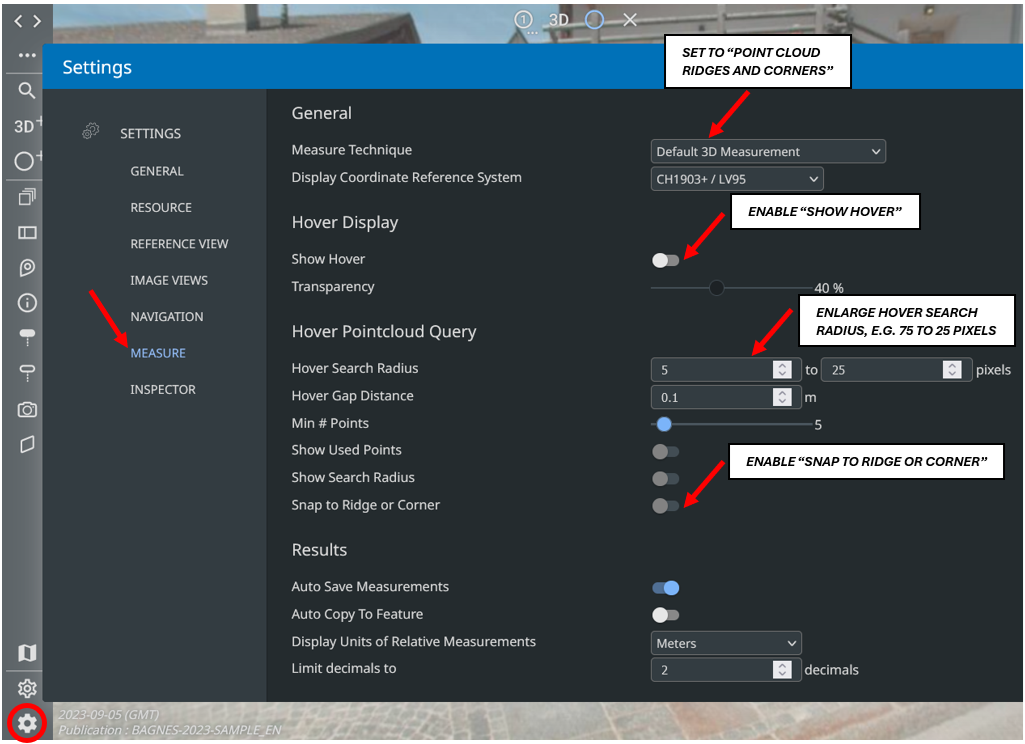
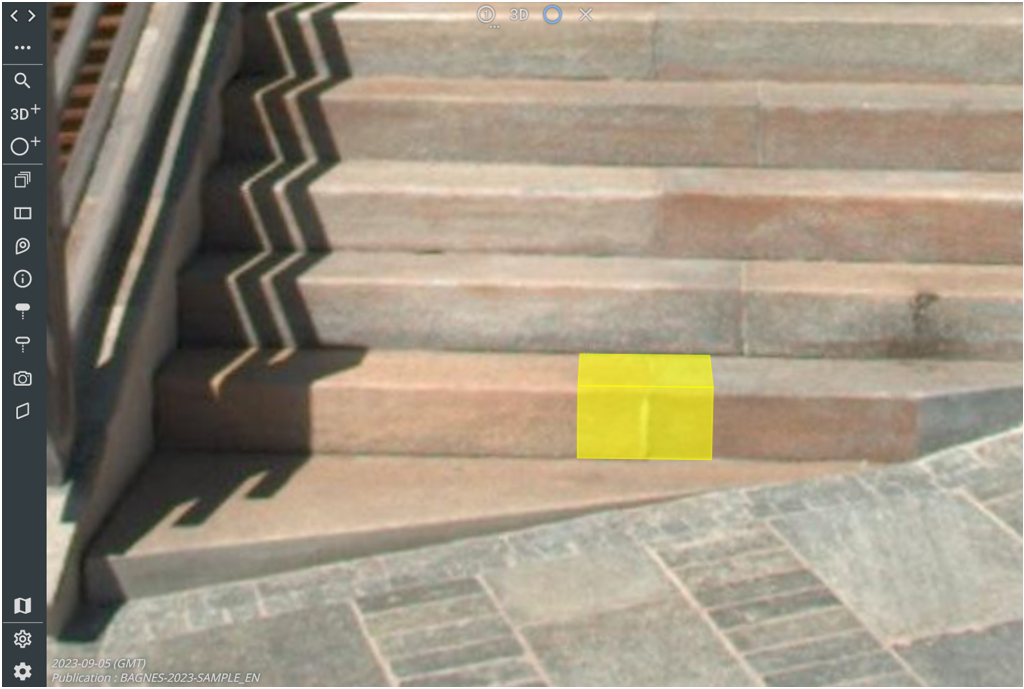
To do measures on stairs, for example, you would need to open the settings menu on the sidebar (the very bottom gear icon) and tweak a few settings in the measure tab.
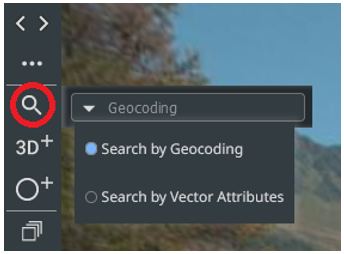
You can use the Geocoding search tool on the sidebar to achieve that — just type or copy paste the address or coordinates here:
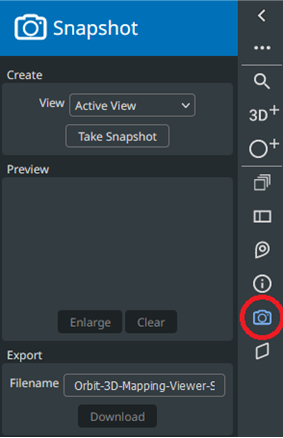
The snapshot menu on the sidebar allows users to take screenshots of either the active view or the workspace and download the images locally.
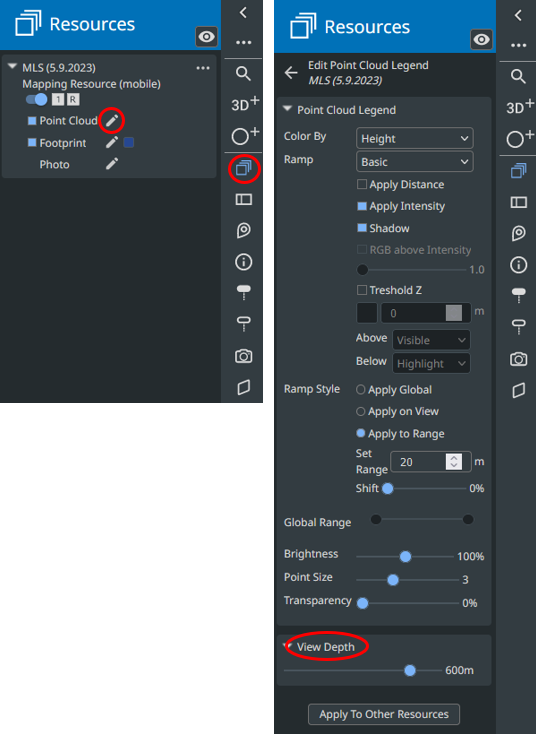
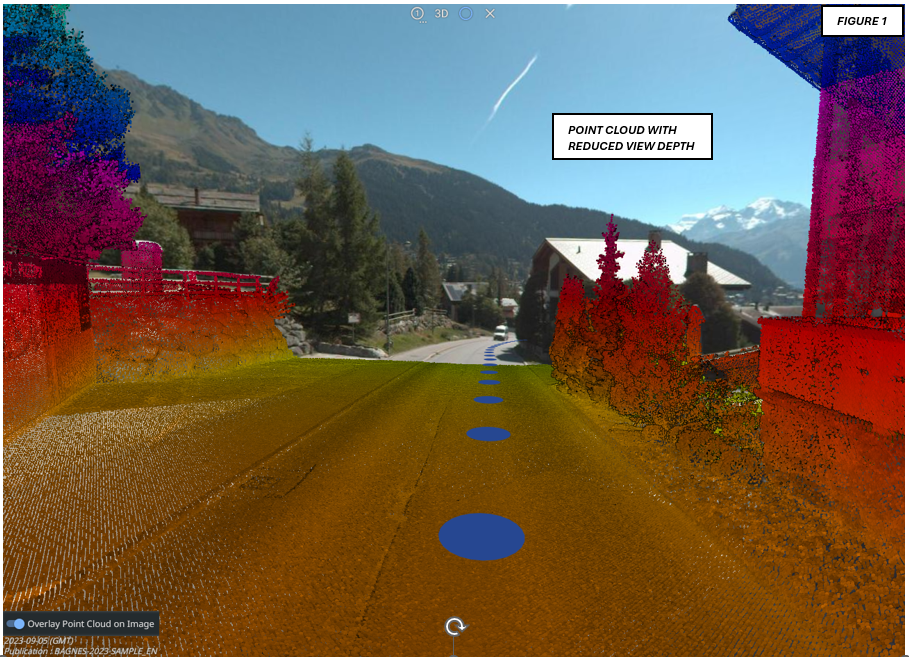
3D point cloud view depth can be adjusted in the Resources navigation menu, additionally allowing to change coloring (by distance, height, intensity, or use default), ramp-related settings, brightness, point size, transparency.
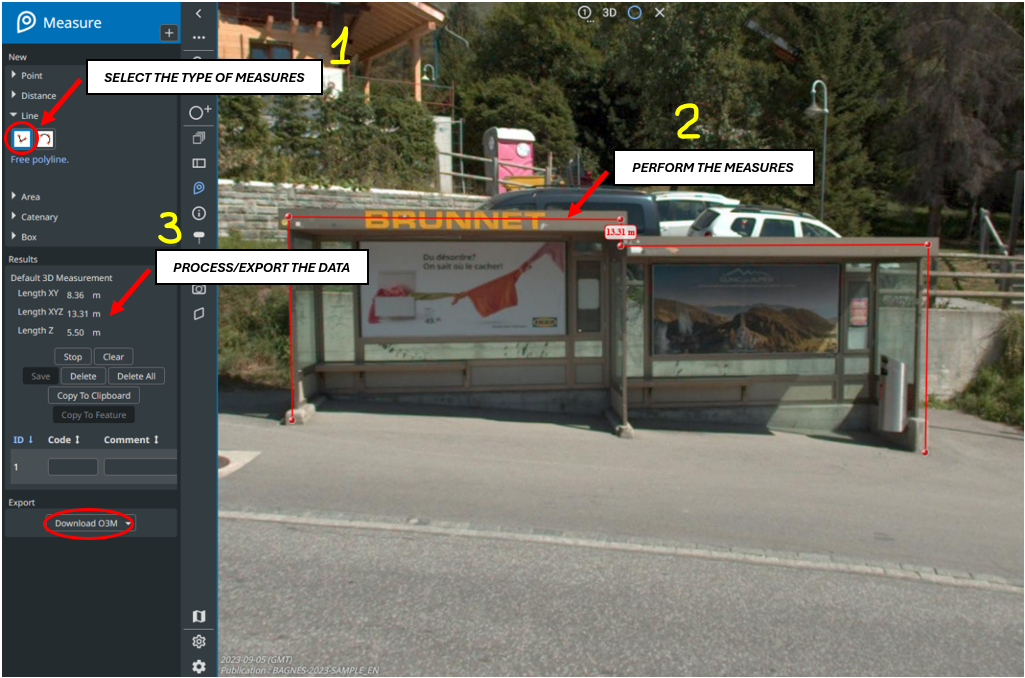
There are several ways of doing that:
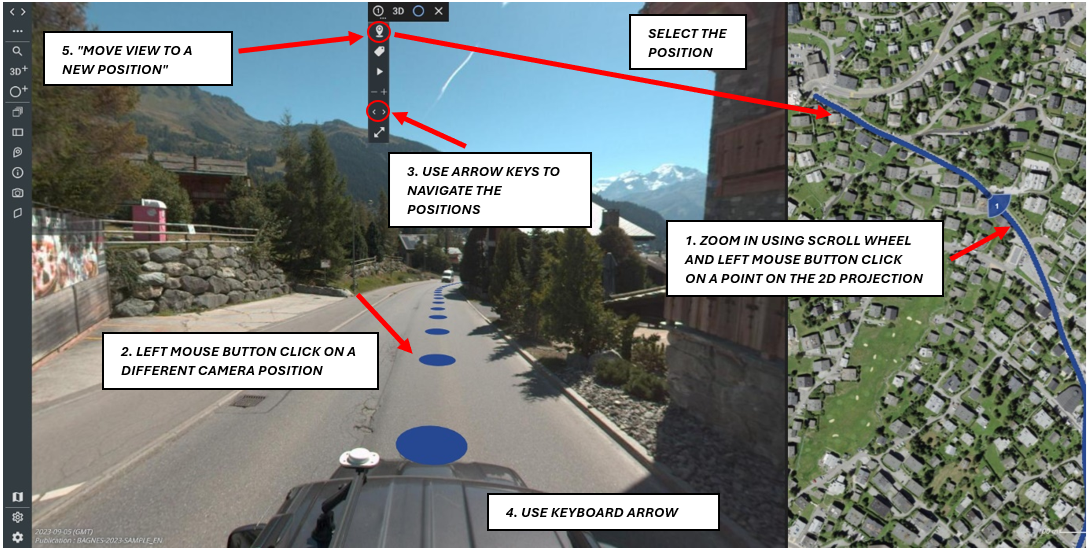
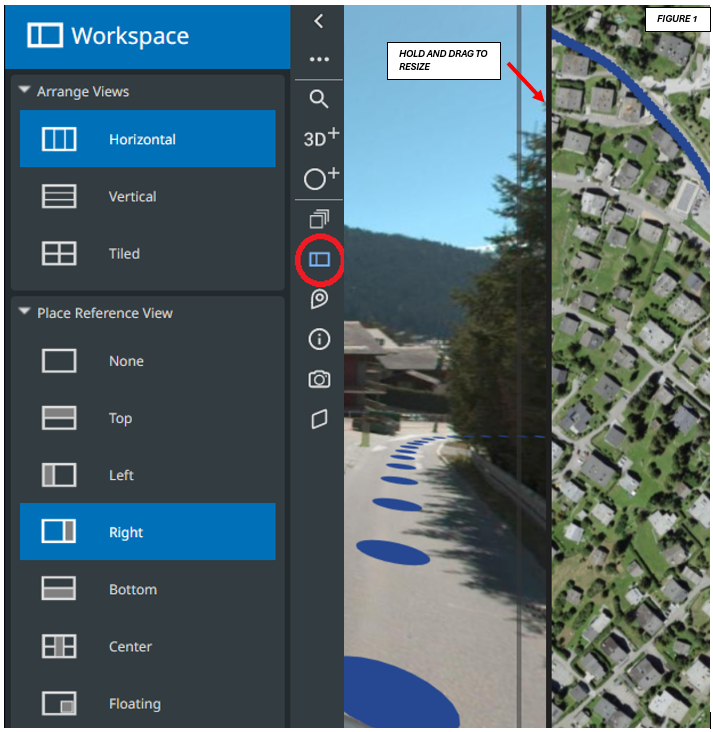
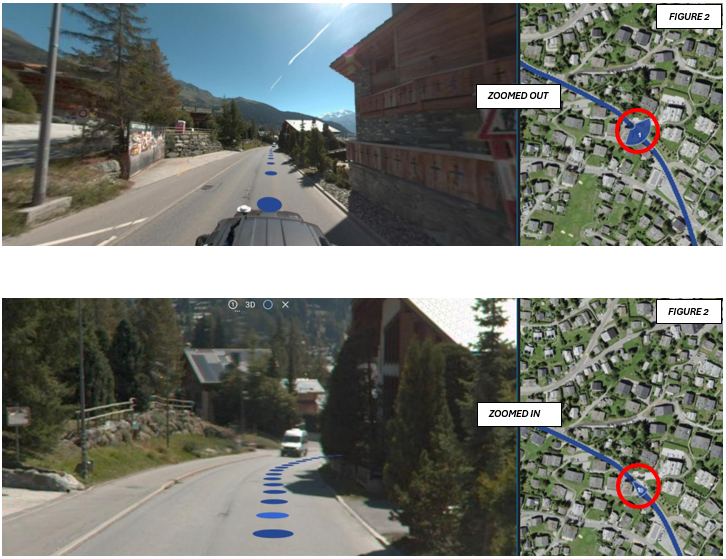
Alternatively, to select a different image on the 2D map while viewing the 3D point cloud, select the "Move view to a new position" option at the top of the screen. Once you have selected the option, click on the desired photo position on the 2D map. You can also rearrange your workspace by opening the workspace sidebar option, and resize the view by dragging the vertical line that splits the two views (FIGURE 1). Using mouse scroll wheel allows to change field of view (FOW). Note: zooming in the 3D panoramic view, thus narrowing the field of view, also narrows the 2D projection FOW (FIGURE 2).
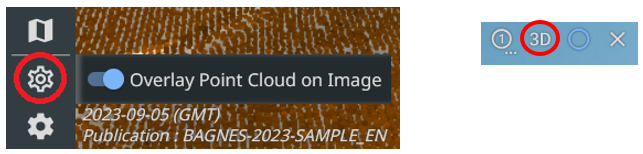
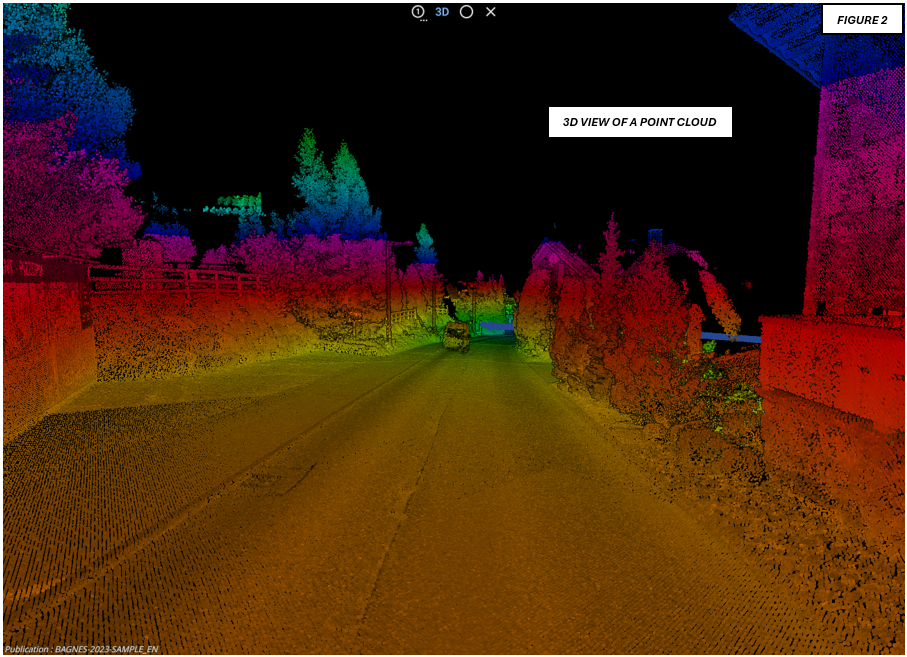
To get familiar with cloud points, we recommend you start by hovering the highlighted gear icon on the sidebar to toggle overlay Point Cloud on the current image (FIGURE 1). Alternatively, to open 3D view of the point cloud instead of the street view, click the 3D button at the top (FIGURE 2).
Note: 3D view of the cloud (FIGURE 2) allows you to have free overview of the area without being bound to the camera positions (the blue dots).
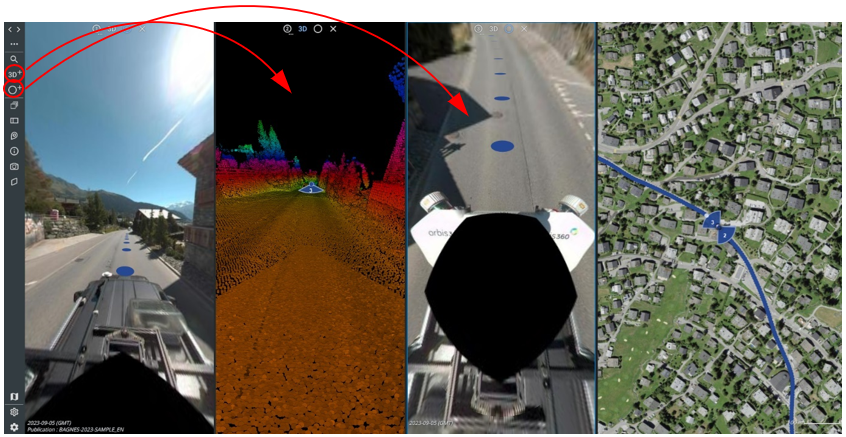
You can open 3D View with Point Cloud, Mesh and Vector Resources in a separate section of your workspace alongside the 3D and 2D view, as well as Mobile Spherical Image. You can get multiple sections of the same type to view different points, too. To start adding sections, click the 3Dᐩ icon on the sidebar, and after that select desired point. It will open the Point Cloud section next to the 3D view. Clicking the Oᐩ icon on the sidebar right below the 3Dᐩ one and selecting a point will open corresponding Mobile Spherical Image.
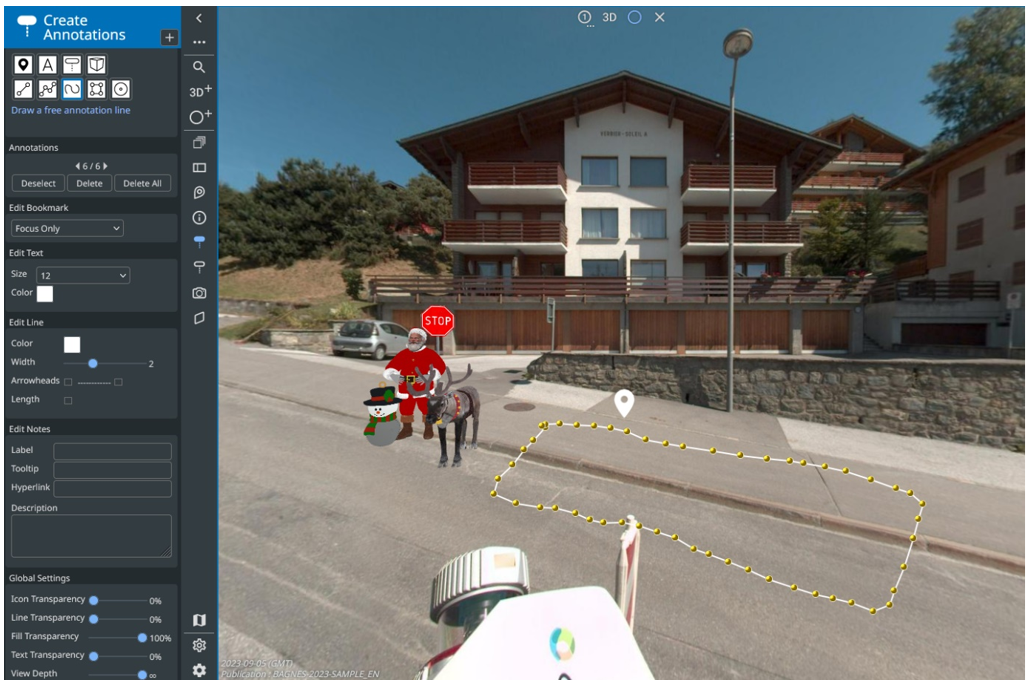
Another way to save/share measurements in Orbit 3DM is by making annotations using corresponding sidebar option. In that section you can find different settings for making labels, highlighting area, putting objects like stop sign, drawing annotation objects (a house, for example), etc. While measurements provide you precise data, annotations are a bit more general, and can help to take notes within the software either for yourself or someone else by using the export feature (see the next section).
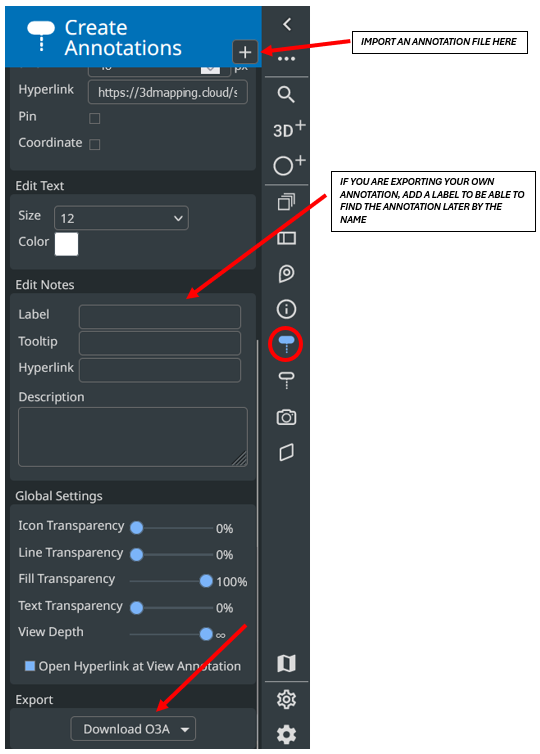
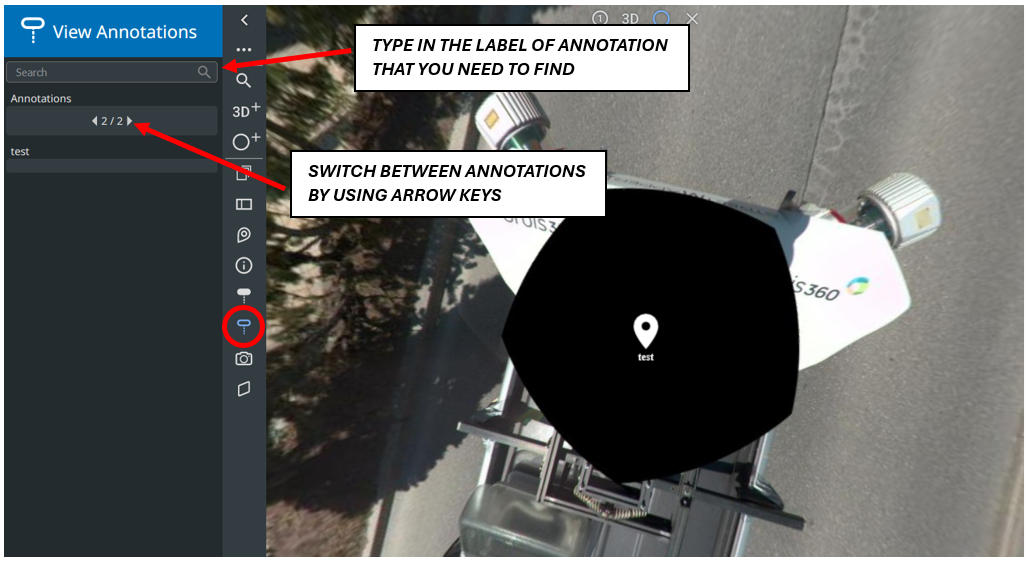
Yes, to do that you would need to export your annotations, just like measurements. To import someone else's annotations, click the plus icon next to the Create Annotations header and select the annotation file on your machine (.o3a file extension). Viewing created and imported annotations is available for each individual user in the View Annotation sidebar section. You can navigate your annotations by slicking left and right arrow keys or by typing the label in the name search field.
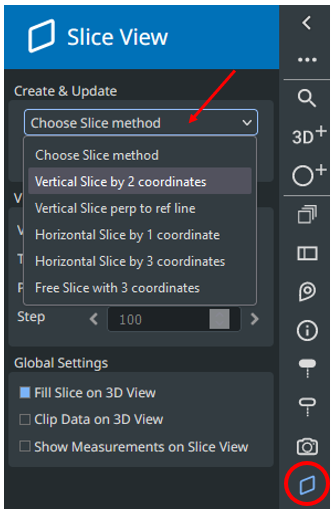
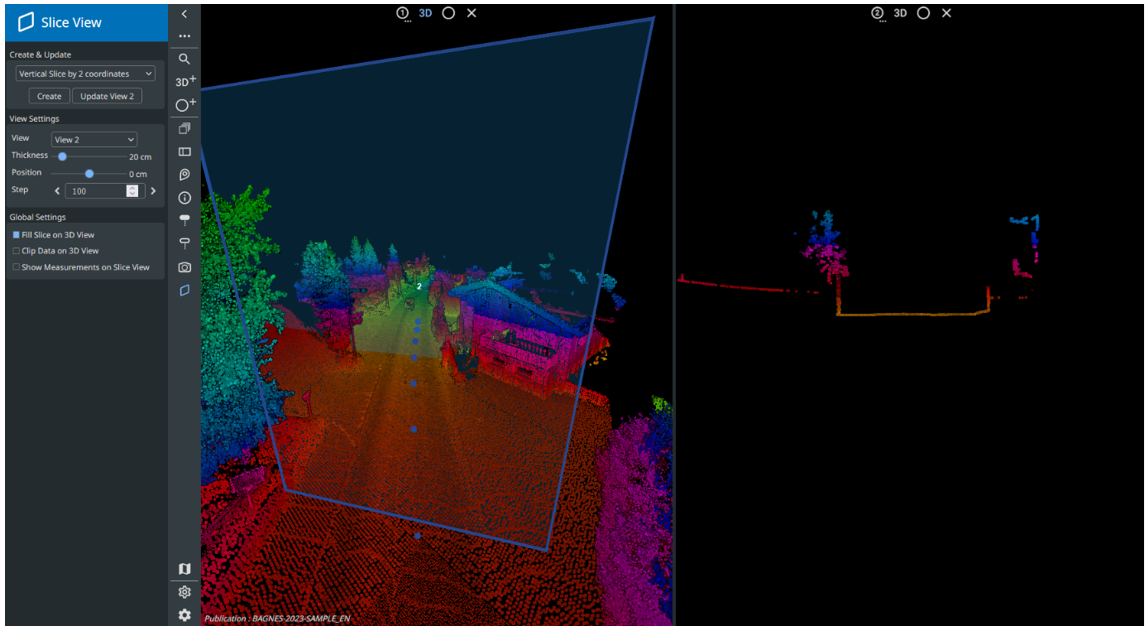
A slice represents a 2D representation of a chosen area from a 3D point cloud based on a defined plane. It can be a horizontal, vertical or user-defined angular plane.
This tool is useful for making measurements in places where there are no points in the point cloud. For example, to measure the exact center of the trunk of a tree, where no points are available.
Note: All the measuring functions available in the Measure can be used in the Slice Viewer.
Choose slice option :